Everything with Pictures in PowerPoint – Part 2
Picture Edits
Two of the most fundamental techniques of image processing include:
- How to crop out images and create your own free standing clipart
- How to combine photos with standard forms
1. How to create “cropped” photo clipart
Two brief remarks about your photos before we deal with the cropping elements:• The better the contrast, sharpness and vividness of the given picture, the better and faster it will be to exempt individual elements.• The similar the colors in the picture or the blurrier the image, the more work you will have to invest with likely unsatisfying results. Also, consider that a small object or an object not clearly seen with a busy background will contribute to a difficult task in producing a free standing image. Consider the quality before you initiate the burden of the bet! In general, the automatic “Remove Background” feature is best used for images with clear surface areas that have a distinct background color – otherwise it is difficult for PowerPoint to recognize what needs to be erased. To create a free standing object effect:

First insert your picture, then go to >Format/ Picture Tools and then click on >Remove Background (on the very left side of your screen).
The first example of a motorcyclist has a neutral background with a strong contrast making it easy to separate the object. After clicking on the “Remove Background” feature, a frame pops up and the elements that should be deleted will be marked violet. Here, it is sometimes enough to look at the slide overview (to the left) to preview how the object will look like.


In contrast, the system is easily overwhelmed with unclear picture elements and highly differentiated parts of the image. The example of China Town involves a lot of manual work of clicking on various parts of the background. The key here is to work in small steps. It may be possible to get the result you want, but it might take the extra time and effort.

The example of the street lamp shows that improvements can often be obtained by making slight adjustments to the position of the frame. Although the background is relatively structured, the gray area of this lamp also stands alone and can easily be removed. The first automatic removal is seen on the left. Adjusting the background frame then makes the additional adjustments, seen on the right. The red box behind the image is simply to highlight this change.


 The tools found on the top left side of your screen including >Mark Areas to Keep, >Mark Areas to Remove, and >Delete Mark, >Discard Changes, and >Keep Changes allow further editing options to the smallest details of your image. It may be helpful to enlarge the image when working on your fine tunes. Be aware though that when working with details, it may be that other areas will be impacted. It’s therefore sometimes better to simply leave out the smallest details as they do not have a significant impact on your image (see the red arrow).
Creating a free standing image is great for product information, advertising or representing individual parts of an application. Enjoy making your own business clipart and take advantage of this feature.
Form Combination Tools
Since PowerPoint version 2010, there are some new tools that can combine forms into various shapes and styles. These features give you fresh look to images and really step up the professional look of your overall presentation.
First what you will need to do is insert these tools into your PowerPoint so you can use them. Go to >File, >Options, >Quick Access Toolbar. Now Choose commands from: choose >All Commands and find > Shape Subtract, >Shape Combine, >Shape Union and >Shape Intersect. Click on these items and then on Add>> They should then appear on the right side of the box. When you are finished adding all the items click OK. These commands should now appear on the top left side of your screen. Now you are ready to insert your images!


![]()
First insert a shape (in this example a rectangle) and insert your image. (If you need help with this step check our first blog in this tutorial series). Now insert another shape (in our example a circle) and lay it on top of your image.

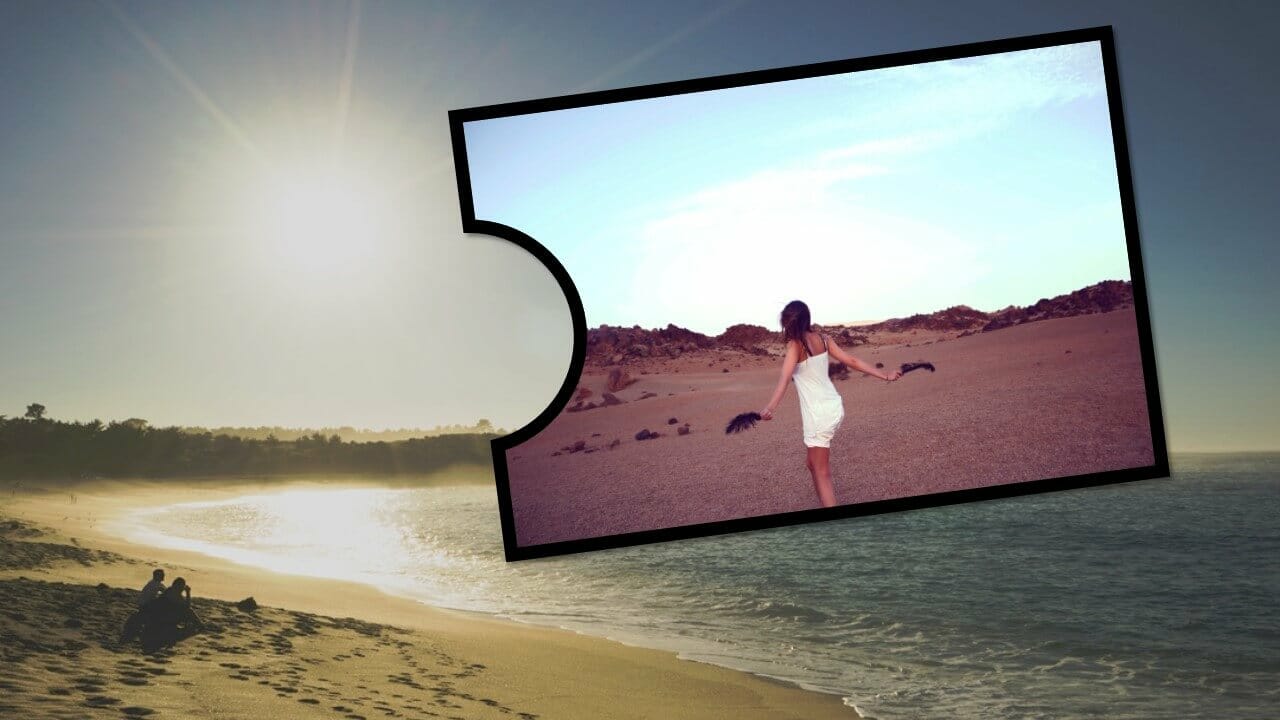
Shape Subtract
Hold the >Shift key and click on the >Rectangle, then the >Circle and then click on the >Shape subtract command. You should get something like this:

Be careful in which order you click on the shapes. Think of a mathematical equation here rectangle – circle = cut out rectangle. Generally you want to subtract the smaller shape from the larger to get this effect.
Shape Combine
Hold the >Shift key and click on the >Rectangle, then the >Circle and then click on the >Shape combine command. You should get something like the following:

Tip: notice that this image does not have a frame like our first subtracted shape. If you also wish to get rid of your border then click on the image and go to >Format/Picture Tools, >Picture Border and >No Outline. This should get rid of the lines.
Shape Union
Hold the >Shift key and click on the >Rectangle, then the >Circle and then click on the >Shape union command. You should get something similar:

Shape Intersect
This option can be especially helpful if you want to make professional bullet points according to your topic. Hold the >Shift key and click on the >Rectangle, then the >Circle and then click on the >Shape intersect command. Now it may be that your image will not fit into the shape, as in our example. To fix this click on the image and go to >Crop and >Fill. (If you need further help with this see our first tutorial in this blog series).


Now you should be able to make your images into clipart and combine your images into different shapes. Take advantage of these tools and give your PowerPoint that professional touch. If you liked these tips, don’t miss our third tutorial on everything having to do with pictures.
Share this post


-

Design Thinking: Problem Solving with a Difference
-
Why Corporate Mission Statements Are So Important
-
7 Tips & Learnings from the Apple Keynote


-
Design Thinking: Problem Solving with a Difference
-
Why Corporate Mission Statements Are So Important
-
7 Tips & Learnings from the Apple Keynote