PowerPoint Slide Masters: Save Time and Customize Your Presentations
Editing a PowerPoint presentation is not without risk: new images or text can ruin the layout, new slides from external sources aren’t visually cohesive. And when it comes to color design, it’s incredibly difficult to accurately reconstruct the original color scheme from sight.
To avoid these issues and a lot of headaches, consider using a slide master. With it, you can change or enhance presentations as often as you like without losing the plot. Here we’ll show you how to best use your PowerPoint slide master.
PowerPoint Slide Master: What is it?
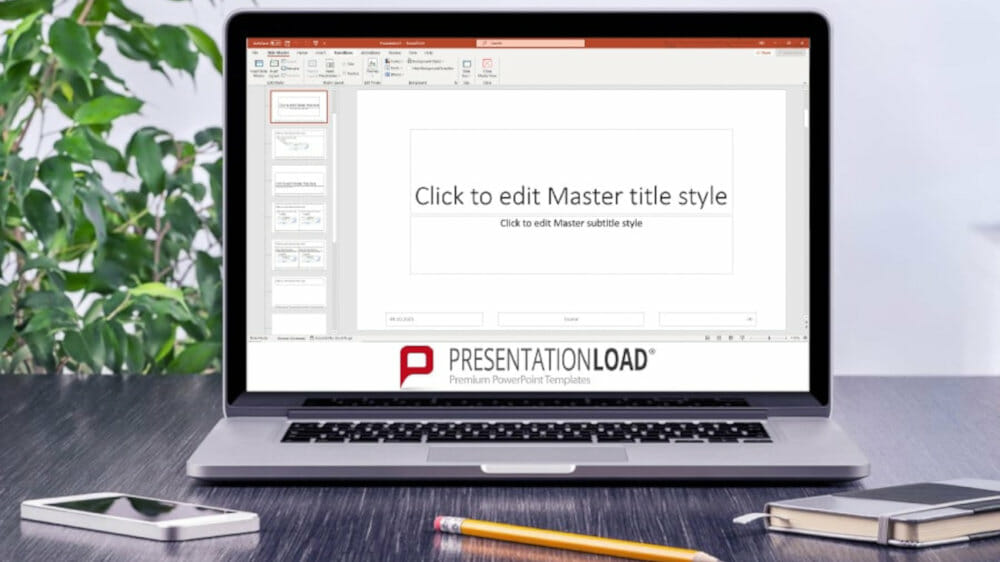
The slide master (found in PowerPoint under > View > Slide Master) is the basic framework and control center of any good presentation. Think of it as a kind of toolbox in the background of your presentation that encompasses all the rules of layout. It helps you maintain a uniform appearance and quickly create new slides at any time. And best of all? You won’t have to worry about annoying formatting.
In the slide master, you can preset the formatting and positioning of all principal elements in your presentation. This includes titles, subtitles, text and image placeholders, footers and logos. In short, the slide master in PowerPoint is nothing more than your individual design template.
Elements that are set in the master can’t be moved or deleted in the normal editing mode. This is a useful feature when you’re working in a team. Team members can create new individual slides or entire presentations in the company’s own design without running the risk of moving or removing essential elements.
When you open Microsoft PowerPoint in edit mode and create a new slide, you or your collaborators will no longer find blank, white surfaces, but will be able to choose the layout design you need right away.
You can make changes on the slide master at any time. These changes are directly applied to all slides. This saves you so much time! It also guarantees that all fonts and font sizes, color schemes and positions of logos or other elements remain identical on every slide.
The benefits of using a PowerPoint slide master
A master layout in PowerPoint allows you and your staff to focus more on content and not waste time formatting or modifying individual slide layouts. This means fewer formatting errors and more consistent presentations across your organization.
Your clients benefit from a PowerPoint slide master, too! Not only is it more enjoyable to watch a professionally designed presentation, but your presentation will also be more persuasive and inspiring.

Are you interested in an individually fitted slide master? Our agency is looking at a successful past in which we were able to help many satisfied customers. Don’t hesitate to contact us!
The master slide
The first slide of your slide master is the master slide, or mother slide. It contains all your fundamental formatting. Adjustments made to this slide will carry over to all your master’s subsequent layout slides, the children. That’s why it’s best to define the font and size of your titles, subtitles, footers and logos on the master slide.
Each layout slide can also be customized. Common layout slides include title slides, divider slides, comparison slides, slides with text-image combinations, image-only slides, slides with list formatting, chart slides and more.

Using a master template customized to your company’s requirements allows you to create a predefined standard for new presentations. This standard plays an important role in shaping your company’s corporate image.
How to use the PowerPoint slide master
The slide master allows you to create custom grids and align elements at specified distances. A well-defined slide master with slide layouts is by no means a set of slides with randomly selected placeholders. It is a well-thought-out construct of layouts and rules.
Defined margins provide the framework for your content. The spacing between the individual objects on the slide (e.g., images, headings), ensure a clean and professional design across all slides.
When our agency creates PowerPoint slide masters for clients, we also select a unique color scheme or adopt the client’s CI (corporate identity) color scheme. This means that you, as a client, can immediately access the predefined color palette to adjust font or object color.
Below you’ll find step-by-step instructions on how to use a PowerPoint slide master correctly.
Create and edit a PowerPoint slide master
1. Open your PowerPoint presentation.
2. Click on the View tab.

3. Click on Slide Master. In the Slide Master view, you’ll see all your presentation’s slide layouts in the thumbnail pane on the left.
4. Click on Insert Slide Master located above the thumbnail pane.

5. The new slide master will appear in the thumbnail pane below the existing slide master. It will be given the number 2 if there is already one slide master, or 3 if there are already two slide masters, etc. Now you can edit the new slide master in the master view.
Any changes made to the PowerPoint slide master are automatically applied to all other slide layouts. Changes to a single slide layout (e.g., title slides, comparison slides, image-only slides) will only affect that specific layout. All new slides with that layout will incorporate the changes you have just made.
The master layout
There are basically two levels to a PowerPoint slide master: the master slide and the subsequent slide layouts/master layouts. These layouts can differ greatly from each other.
Certain slide layouts work better than others, depending on what content you intend to include. Some are better for presenting images or graphs, while other layouts are more suitable for text-heavy content.
All layouts consist of coordinated text and/or object placeholders that are scaled and designed to match the purpose of the slide. These “objects” are, for example, photos, statistics, or animations. You can quickly add content to the placeholders and customize the different layouts as needed.

A change to the master slide applies to all slides in your presentation. A change to a particular slide layout applies to all slides with that specific layout. Do you want tighter spacing between individual text or image boxes on all comparison slides?
All you need to do is make this change on the comparison slide master layout in the Slide Master view. All comparison slides in your presentation will have the new layout.
Tip: Slide Master view vs. Normal view: Changes made in Slide Master view can’t be changed or accidentally deleted in Normal view. This makes editing mistakes to the layout almost impossible.
Rename a PowerPoint slide master
1. Open your PowerPoint presentation.
2. Click the View tab.
3. Click on Slide Master.
4. In the thumbnail pane, right-click the layout slide you want to rename and select Rename Layout.
5. In the dialog box, enter the new name for the layout and click Rename.
6. Click on Close Master View and switch to the Home tab. Click on Layout in the Slides group. You will now see the renamed slide layout in drop-down menu.
Use different PowerPoint slide masters
Can’t decide which design suits your content or personal preferences best? You can insert several design themes and combine them with each other. To do this, you’ll need several PowerPoint slide masters.
How to add multiple PowerPoint slide masters:
1. Go to View > Slide Master to switch to the master slide view mode.
2. Click Insert Slide Master in the Edit Master group.
3. Your new slide master will appear below the previous one. You can now edit the new slide master as you wish or use a theme template to customize it.
Shortcut: In Slide Master view, click on Themes to select a new design. You can then create a new slide master in the selected theme.
Editing headers & footers in the PowerPoint slide master
1. Go to View > Slide Master.
2. Select the master slide from the thumbnail panel on the left.
3. You’ll see placeholders for footer content at the bottom of the slide. Fill, customize and arrange these as desired. To create a header, place one of the boxes at the top of the screen.

4. In the Home tab, you can change elements such as font, font size and color scheme.
5. Go back to Slide Master and click Close Master View. All changes will be saved and automatically applied.
Other PowerPoint masters
In addition to the slide master, PowerPoint provides two other helpful masters: the PowerPoint handout master and the PowerPoint notes master.
Handouts are printouts of your presentation that you can pass out to your audience before or after your presentation. The handout master helps with the content and visual design of these handouts. As with the slide master, changes made in the handout master apply to all pages of the handout.
Go to View > Handout Master. Here you can define formatting, color design and how much content should be used on each page of the handout.

PowerPoint’s notes master helps you organize additional information or personal notes. During a presentation, your screen will display each slide’s notes. Best of all, the audience won’t see any of this.
The PowerPoint notes master allows you to customize the structure of your note pages across all slides. Just like the other masters, all changes are automatically applied to all note pages. Go to View > Notes Master to customize your personal note pages.
The PowerPoint slide master: organizer, time saver and designer for your PowerPoint presentation
The PowerPoint slide master functions as the control center of a presentation. In it, you can define design rules that affect every slide. PowerPoint also offers the handout master and the notes master. All three masters have children slides or pages.
All changes to a master are automatically applied to every slide. PowerPoint’s masters are the perfect tools for creating a professional and consistent layout and design for your presentation.
Are you interested in an individually fitted slide master? Our agency is looking at a successful past in which we were able to help many satisfied customers. Don’t hesitate to contact us! We’d be happy to design a layout that suits your individual preferences and needs.
If you have questions about the slide master or other topics regarding powerpoint – please write us an email to [email protected]. We would be happy to help!
Share this post


-

Design Thinking: Problem Solving with a Difference
-
Why Corporate Mission Statements Are So Important
-
7 Tips & Learnings from the Apple Keynote


-
Design Thinking: Problem Solving with a Difference
-
Why Corporate Mission Statements Are So Important
-
7 Tips & Learnings from the Apple Keynote