Tutorial: How to display 4:3 PowerPoint Presentations in 16:9
The release of PowerPoint 2013 influenced users to display their old 4:3 presentations in the new 16:9 widescreen format. Our tutorial will show you how to easily convert 4:3 presentations into 16:9.
An increasing number of PowerPoint users are confronted with the issue on how to display common 4:3 presentations in the meanwhile established 16:9 widescreen format. In the majority of cases it is not easy to switch the format to a satisfying result.
You will quickly notice that after a simple format conversion the complete slide content looks different. For example, text boxes, tables or charts seem to be misplaced. Images, vector graphics and some diagrams are distorted because PowerPoint just stretches the slide content. Especially circle charts look like ellipses after a simple conversion.
Unfortunately this graphic chaos can’t completely be prevented. But by considering a few tricks much time and effort can be saved with slide adjustment. The following steps will demonstrate on how to easily manage changing the format from PowerPoint 2007 to 2013.
(PowerPoint 2007 and 2010 doesn’t provide any comfortable options to change the format. In this situation improvising is the key to achieve a satisfying result.)
Step 1:
Start a 4:3 presentation and copy it to the same directory. Insert “16×9” to the original filename. For example: my-presentation-16×9.pptx.
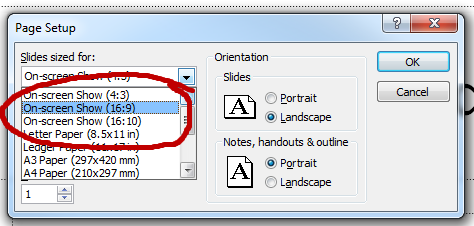
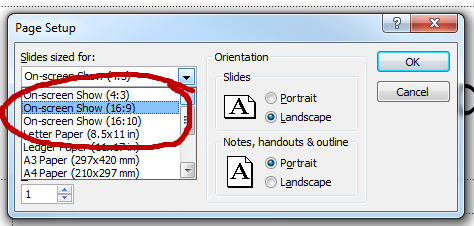
Reopen the presentation and click on DESIGN – SET UP PAGE. Click PAPERFORMAT and choose the option PRESENTATIONDISPLAY (16:9). Click OK. Now you will notice that the slide content is misplaced and distorted.
Step 2:
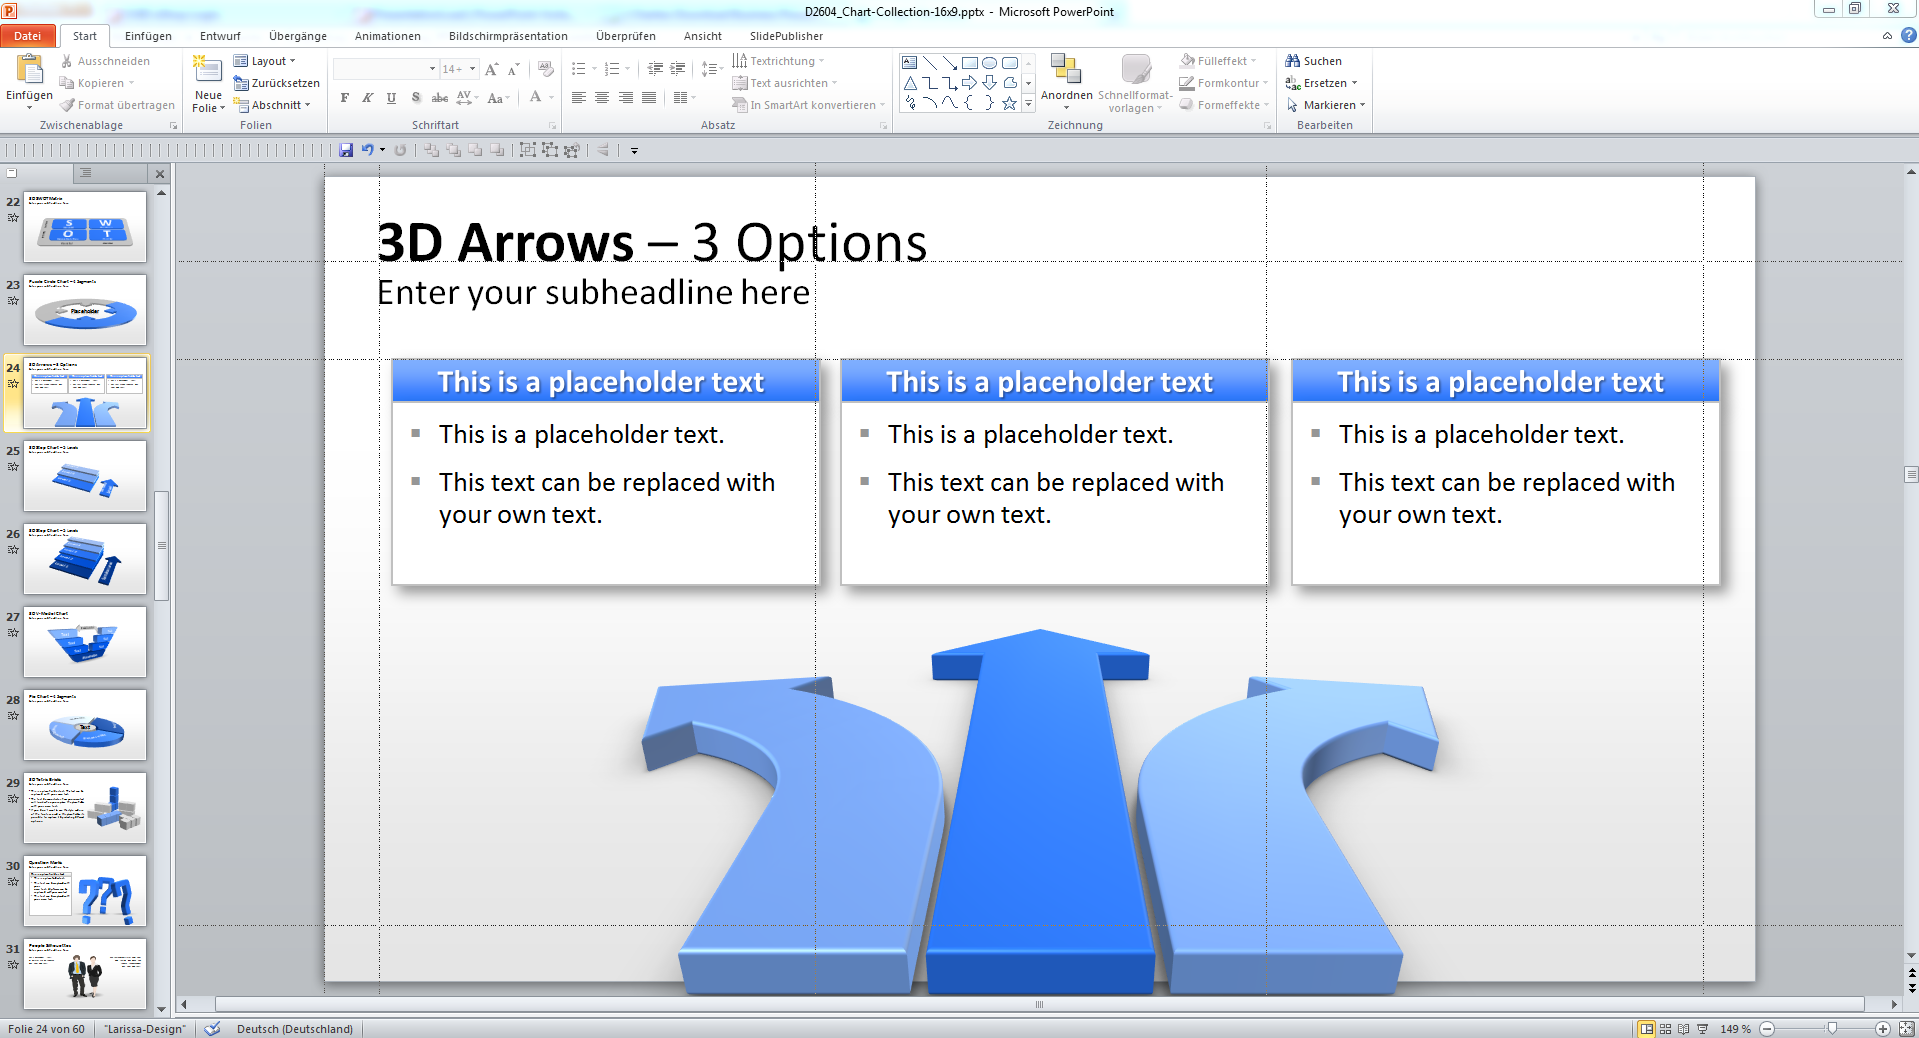
Simultaneously open the original 4:3 presentation which is required to replace distorted graphics in the 16:9 version. Unfortunately you have to manually adjust each slide. Creating raster graphics to exactly align relevant and reoccurring elements will save an enormous amount of time.
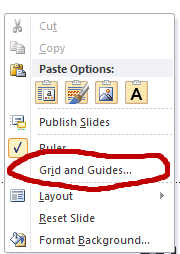
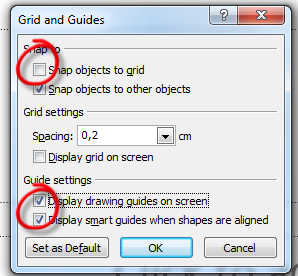
Right click to display the ledger lines as shown in pic.3 and 4. Remove the small hook at ALIGN OBJECTS AT GRID to pixel-precisely arrange objects.
(Microsoft provides intelligent ledger lines starting with PowerPoint 2010. They simplify the arrangement of elements of objects and is activated in PowerPoint 2010 and 2013 by default.)
Step 3:
Replace the distorted objects. Click on the corresponding slide of the simultaneously in the 4:3 opened presentation and copy the object by pressing CTRL+C. Paste it with CTRL+V into the corresponding 16:9 slide. Readjust the graphic.
PowerPoint 2013 provides new options in order to switch the formats. Selecting the widescreen format via the dropdown list enables you to choose between the options maximize and scale suitable.
Choosing maximize, will have the effect that all objects on the slide are proportionally scaled to the maximum slide width, which saves manual scaling but often requires a replacement of the objects.
Choosing the function scale suitable shrinks the original content and places it at the middle of the slide. As this could also cause distortions this option is not recommended.
