PowerPoint Table of Contents: Your How-To Guide
You’ve invested a lot of time and hard work into your PowerPoint presentation and want to make a strong impression on your audience. Don’t forget to include a PowerPoint table of contents. It will guarantee your audience will have a clear overview of your presentation right from the start.
SWe will show you how to easily create different versions of tables of contents in just a few steps.
Why use a table of contents?
A professional PowerPoint presentation should always include a table of contents. It shows your audience what they can expect – right from the start of your presentation. But a table of contents does even more than that. It provides structure and clarity.

A first look at presentation content can also get an audience excited about what they’re about to hear. And hyperlinks to specific slides make it easier to refer back to a slide when questions arise.
Which structure does an effective table of contents have?
To appeal to your audience, your table of contents should be clear, concise, and easy to understand. This helps your listeners grasp the structure of your presentation at a glance.
However, it is almost impossible to give a precise outline as each presentation is structured differently and has a different outline. Therefore, plan the structure of your presentation and outline main arguments that you want to present in each section.
This way you ensure that your presentation is well organized, coherent, and easy to follow. A well thought-out structure also helps to ensure that your table of contents is clear and user-friendly.
Each heading presents one main argument or section of your presentation whilst the subheadings describe the most important contents of each paragraph.
Be sure to use concise and meaningful titles that describe the content of each section. This makes it easier for your viewers to grasp the different parts of your presentation and it helps you convey your key message.
Tip: Pay attention to formatting and font
An effective table of contents in PowerPoint shouldn’t just be well organized but also visually appealing and easy to read.
Pay attention to consistent formatting and fonts to ensure a harmonious look and keep the focus on the content. Be sure to show the hierarchy of the different levels clearly by using indentation or different font sizes.
This will increase readability and allow viewers to better understand the connections between the different parts of your presentation. If necessary, you can also use numbered or bulleted characters to emphasize the order of the points.
Choose colors and design elements that fit in with the design of your presentation. It is best to avoid unnecessary design elements that distract from the contents.
Tailor your table of contents to your presentation and your target audience by using a formal or informal style. You can also use additional elements such as symbols or icons to emphasize certain topics.
Creating PowerPoint tables of contents: 2 options + extra tip
Option 1: How to create an automatic table of contents in PowerPoint
Note: The following step-by-step tutorial is for Office 365 PowerPoint.
1. Open your PowerPoint presentation.
2. Create a slide where your table of contents should be. To do this, go to the thumbnails pane on the left and click between the two slides where you want to insert a new slide so that a horizontal line appears. Click on the Home tab, then New Slide in the Slides.
3. Create a text box on this slide by going to Home > Insert > Text Box.
4. Now click on View.
5. From the Presentation Views group, select Outline View. You’ll now see your presentation’s headings and subheadings in the thumbnails pane.
6. Right-click in the thumbnails pane and point your mouse to Collapse. Another options menu will open.

7. Select Collapse All. Now you’ll now see only the headings of the individual slides in the thumbnails pane.
8. Mark all headings with your mouse and select Copy or use the shortcut Ctrl + C.
9. Click on Normal in Presentation Views.
10. Click the text box on your table of contents slide and use the shortcut Ctrl + V.

11. Alternatively, you can go to the Home tab and click Paste > Paste Special where you can select either Formatted Text (RTF) or Unformatted Text. You can also change its appearance in the Fonts group.
Note: If you’ve used a colored background for your slides, your table of contents may not be visible. In this case, select the entire table of contents and go to the Fonts group in the Home tab to change colors.
Option 2: The manual option
1. Open your PowerPoint presentation.
2. Add a new a new slide where you want the table of contents to be (see previous tutorial).
3. Go to the Insert tab and select Text Box. Now insert a new text box on your table of contents slide.
4. List the desired headings in text box. You can format your table of contents by going to the Fonts group in the Home.

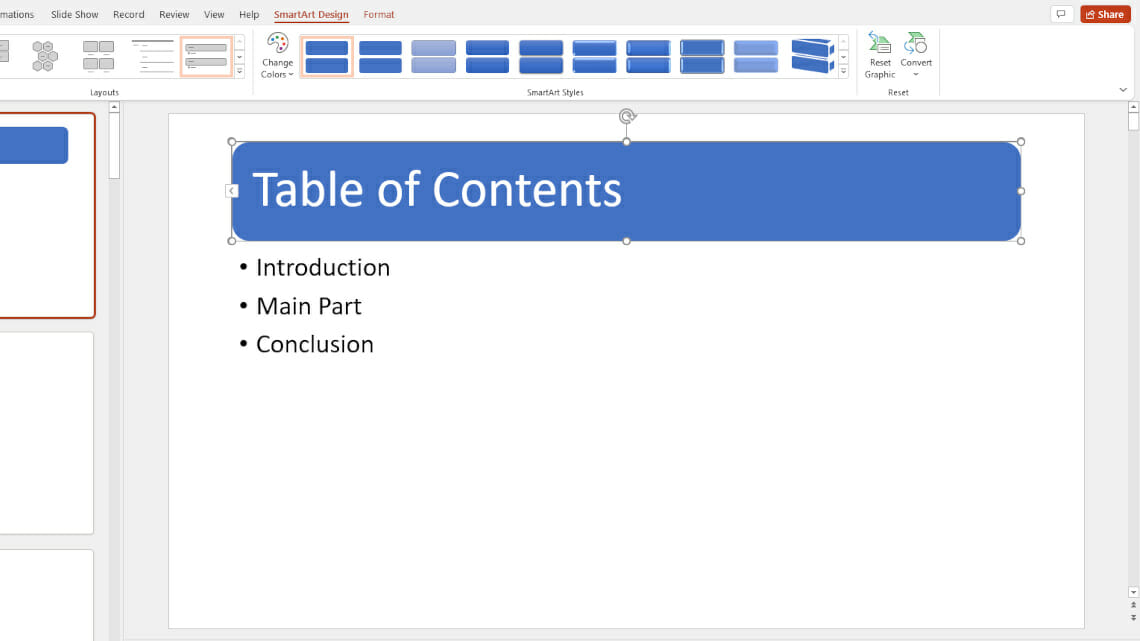
Extra Tip: Add visual interest: Use SmartArt
A PowerPoint table of contents is pretty easy to make. But how about making it something that really grabs the eye? You can give yours more visual impact with SmartArt. Here’s how to use SmartArt graphics in your PowerPoint table of contents:
1. Open your PowerPoint presentation and insert the table of contents as described above.
2. Click on the text field containing your table of contents and select the entire text by pressing Ctrl + A.
3. In the Home tab, go to the Paragraph group and select Convert to SmartArt.
4. You’ll now see an overview of the various SmartArt designs. Hover your mouse over each option will immediately show you how your table of contents will look. Can’t find a design that works for you? Then click More SmartArt graphics… for even more options.
5. Click on the graphic of your choice and your PowerPoint table of contents will automatically adopt the new design.

6. In the SmartArt Design tab, you now have the option to make further edits. You’ll find SmartArt Styles, various Layouts and the option to Change Colors. PowerPoint suggests various color designs for your table of contents.
7. In the SmartArt Styles menu, you’ll find 3D effects and other exciting design options for your text boxes and SmartArt components.
8. Once you’ve decided on an effect, click it to apply it to your table of contents.
Create Hyperlinks
One added perk of using a PowerPoint table of contents is the ability to add hyperlinks to individual slides. This allows you to access content more quickly and respond immediately to questions from your audience.
1. Open your Microsoft Office PowerPoint presentation and insert the table of contents as described above.
2. In the table of contents, select the heading you want to link to a specific slide in the presentation.
3. Click the Insert tab and select Link.
4. Click Insert Link… from the drop-down menu.
5. This will open the Insert Hyperlink Under Link to, select Place in This Document.
6. You’ll now see a list of all slide titles in your presentation. Click on the slide title you want to link to the marked heading and confirm with Ok. The heading now has a hyperlink to the slide in your PowerPoint presentation.
7. Repeat this process for all headings in your presentation’s table of contents.
For advanced users: Create an interactive table of contents
The Zoom function allows you to create an interactive table of contents. Each PowerPoint zoom allows you to jump to and from ant slide or section of your presentation in any order you want. There are three different zoom techniques:
Summary zoom
Summary zoom provides an overview of your entire presentation on one slide. You can use it to jump from one place in your presentation to another however you like. The slides you include will become the first slides of your summary zoom sections.
Section zoom
With section zoom, you can create a link to the first slide of your presentation sections. The interactive table of contents will be inserted on your current slide.
Slide zoom
Slide zoom creates links to specific slides in the presentation. This does not automatically create an interactive table of contents.
Want to use one of the Zoom functions? Here’s how to do it:
Summary Zoom
1. Go to the thumbnails pane and click on a slide. Your summary zoom slide will be created above the slide you’ve selected.
2. Go to Insert > Zoom and select Summary Zoom.

3. Select the slides you want to include in your summary zoom. Here we’ve selected PresentationLoad, Newsletter and Design.

4. Click Insert. You’ll now see your summary zoom as a new slide above the slide you selected in step.

Section zoom
Before you can use section zoom, you’ll need to divide your presentation into sections.
1. Create a new slide to insert the zoom objects for the interactive table of contents.
2. Select this slide and go to Insert > Zoom > Section Zoom. The following window will open:

3. Here you can select which sections of your presentation you want to appear in the table of contents. After your selection, click Insert.
4. The zoom objects will appear on top of each other and must be positioned manually.
Slide zoom
1. Select the slide you want slide zooms to appear on.
2. Go to Insert > Zoom > Slide Zoom.
3. This opens the Slide Zoom dialog box. Click the slides you want to use in your slide zoom.
4. Click Insert and your slide zooms will appear on your selected slide.
How to use zoom links
Click on a zoom link thumbnail to open the Zoom tab. The Zoom tab offers the same standard formatting options that are available for pictures. On the left you’ll find the Zoom Options group to control your zoom. If Return to Zoom is checked, your zoom will go back to the slide with the original zoom link on it once you’ve navigated to the end of a slide or section.
When you click on the tab, you’ll see a small box with a number in each of the thumbnails. This number shows you which slide (or slide sequence in a section zoom) the link goes to. The back arrow inside the box shows that Return to Zoom is turned on.
A table of contents provides a simple and streamlined overview of your presentation content
A table of contents is an essential part of any presentation and PowerPoint makes it easy to create a clean and professional agenda.
By following our tutorials, you can easily customize your PowerPoint table of contents. SmartArt offers even more options to customize and pique your audience’s attention right from the start of your presentation.
Say goodbye to time-consuming scrolling by using one of the zoom options. With just one click, you can jump to anywhere you want in your presentation. Try it out for yourself!
Need help with your table of contents or have a general question about PowerPoint? Feel free to contact us at [email protected].
Are you looking for visually supportive and professionally designed slide templates? Feel free to have a look around our store. Here we have numerous slides prepared for you to download on a wide variety of (business) topics. Take a look today! ► To the store
Take a look at these templates:


These articles might also interest you:
How to Create a Mind Map in PowerPoint
Structuring a PowerPoint Presentation: How to Really Reach Your Audience
Share this post


-

Design Thinking: Problem Solving with a Difference
-
Why Corporate Mission Statements Are So Important
-
7 Tips & Learnings from the Apple Keynote


-
Design Thinking: Problem Solving with a Difference
-
Why Corporate Mission Statements Are So Important
-
7 Tips & Learnings from the Apple Keynote